It's a cedar-strip sea kayak. It's made from western red cedar, Alaskan yellow cedar, fiberglass/resin, carbon-fiber cloth/resin, and lots of careful effort combined with a complete unwillingness to accept that I had almost no idea what I was doing.
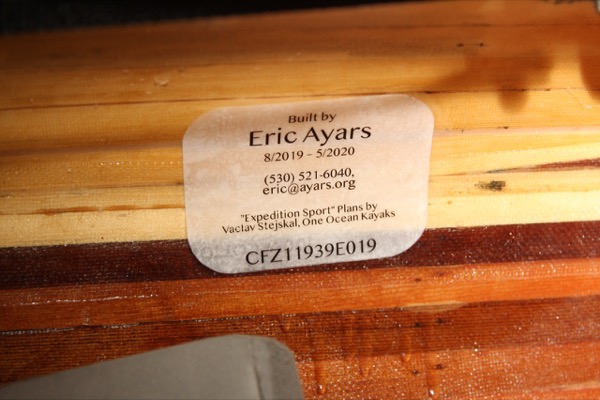
I started with plans and a build manual from Vaclav Stejskal at One Ocean Kayaks. He's very helpful, the manual is worth the price, the plans are excellent, and I recommend him highly for anyone considering doing this. The wood was 'talongrip' pre-cut strips obtained from Totemstrips and I highly recommend them also. I bought close to 1300 feet of strip for a reasonable price, and I think maybe two of the strips at most were kinked or mis-cut. The rest were perfectly straight, cut and planed and perfect. These made it easy. It took me 340 hours, over 8 months. This was my first build of anything like it, and I spent a lot of time just figuring things out. The next build (yes, I've started the second one already) is going much faster now that I know what I'm doing.
I built the 'spine' from strips of plywood glued/nailed together. This one is 2x5 inches, 16 feet long. It forms the straight reference and support for all the stations, so I took some time making sure it was as straight as possible.
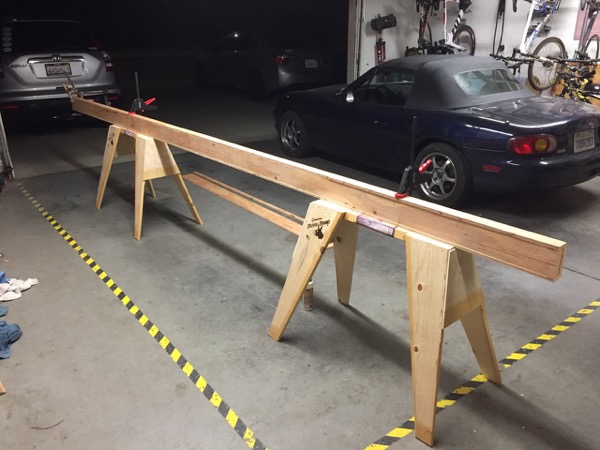
After getting the plans, I trimmed the spine for length and built a 'strongback' for it to sit on while I was working. In this picture it's just sitting on the strongback; once I got the stations cut and mounted I tacked it down with a pair of deck-screws so it didn't consider wandering off during vigorous sanding.
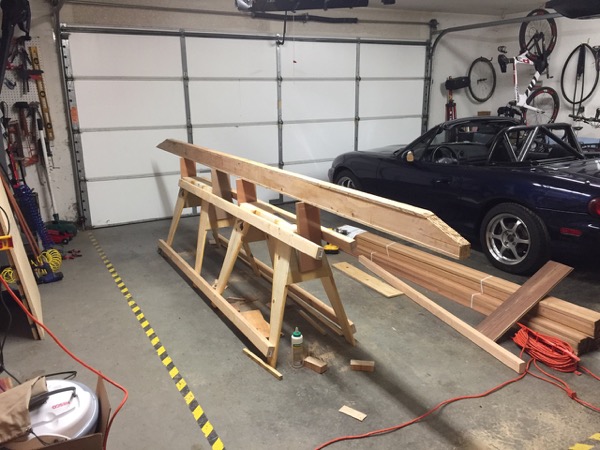
Vaclav's plans are really excellent in this regard: Just cut them out and glue them down, then cut out the stations with a jigsaw.
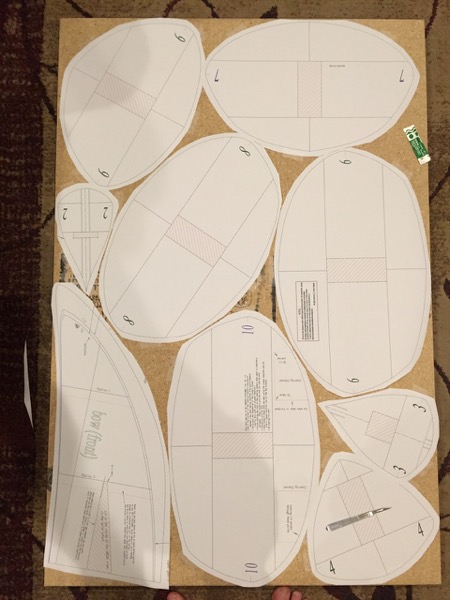
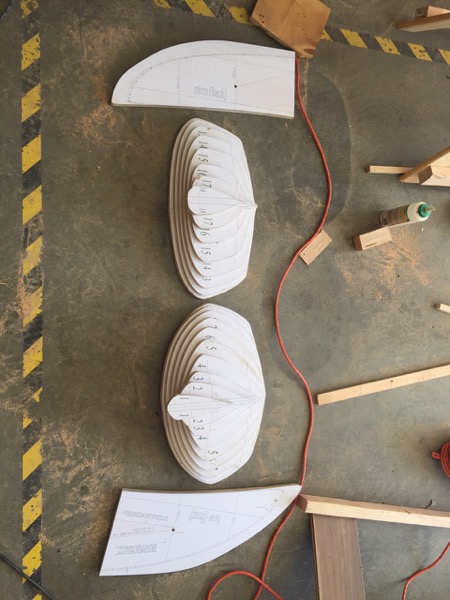
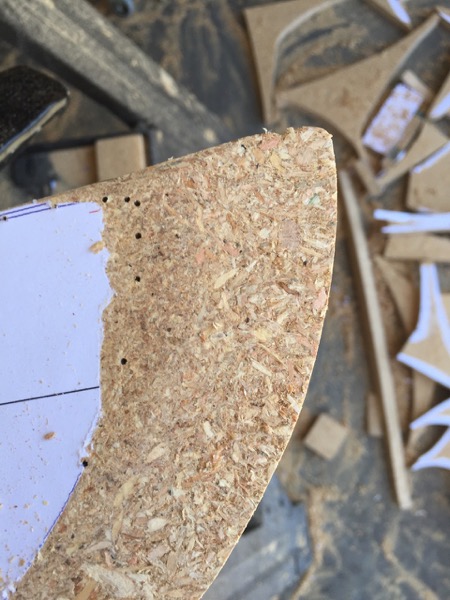
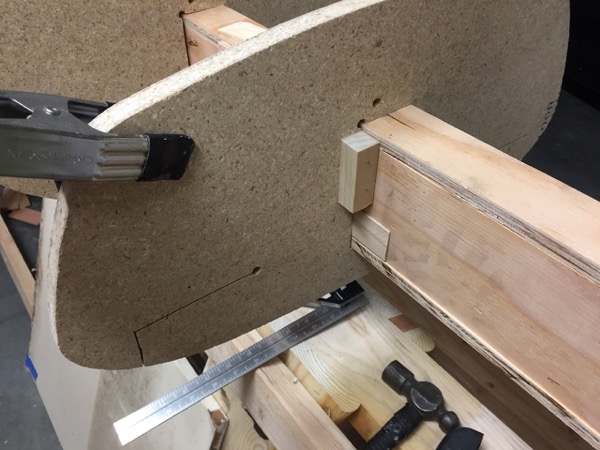
The bow and stern stations need to be tapered, and the end-stations glued on.
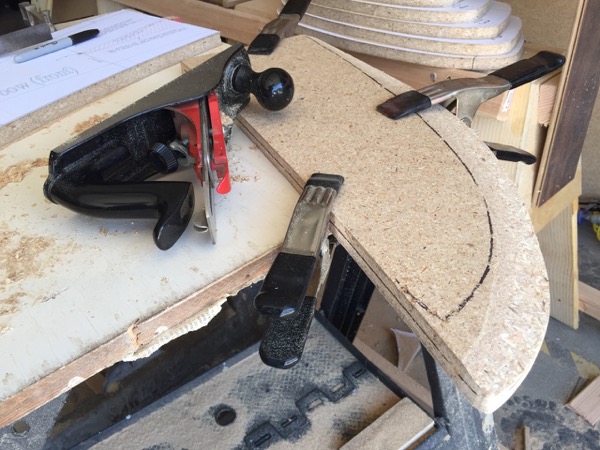
I drilled a set of holes along the taper line so that I knew where to start the taper on the backside of the end-station.
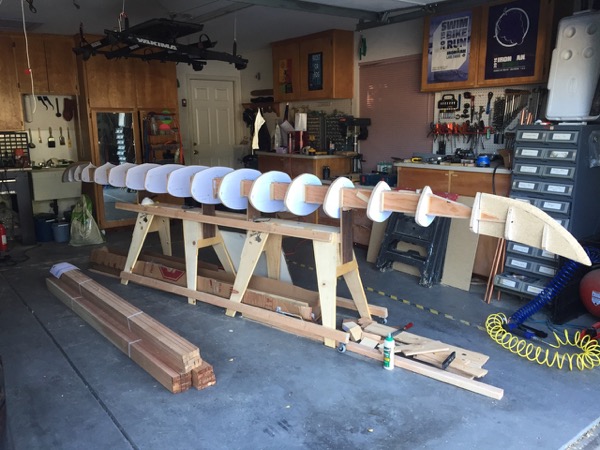
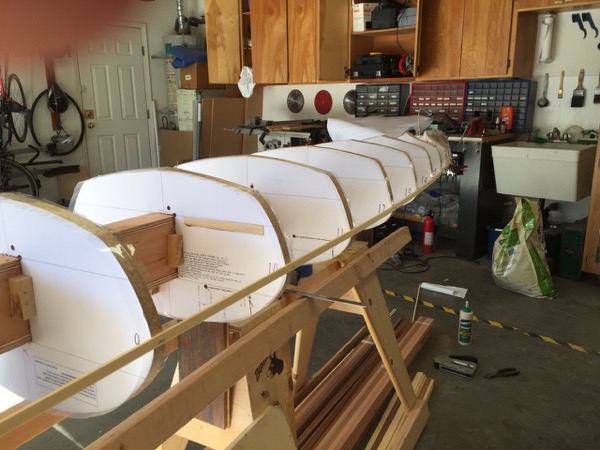
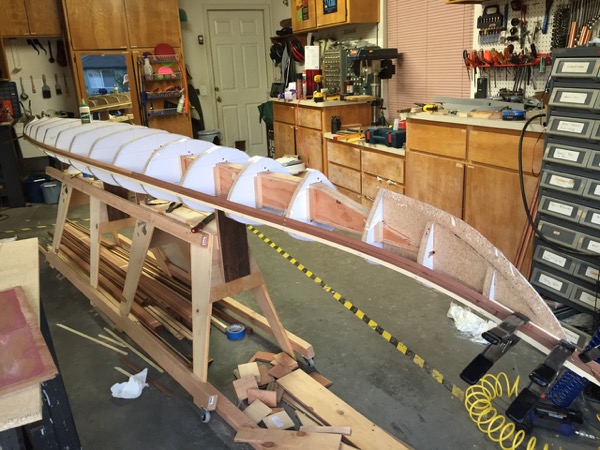
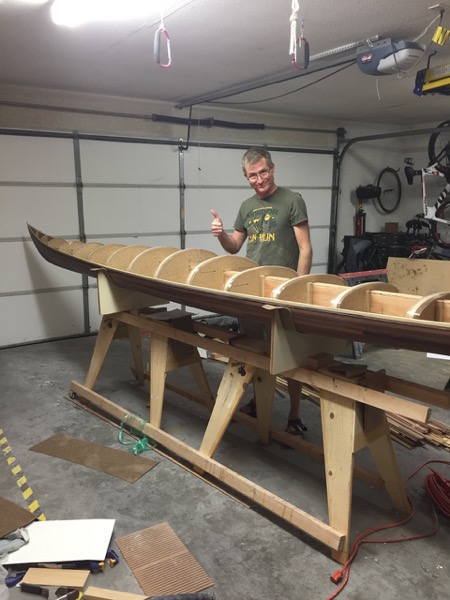
Here are the stations thrreaded onto the spine and roughly in place -- it's starting to look like a boat!
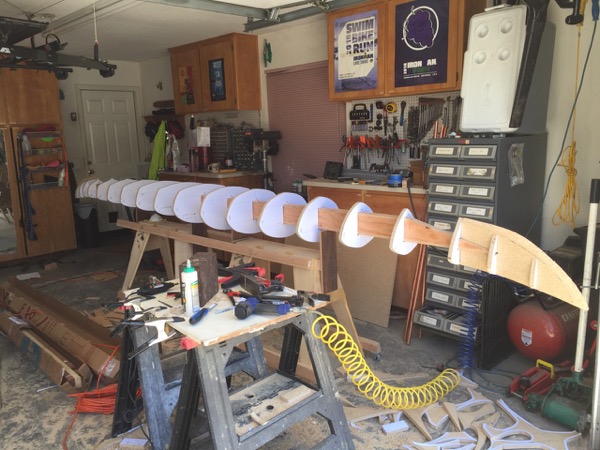
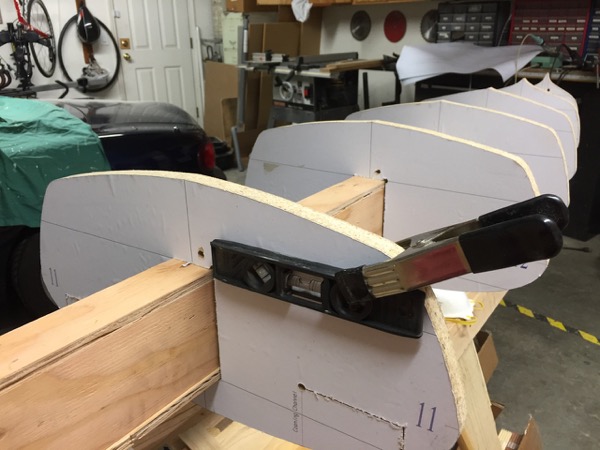
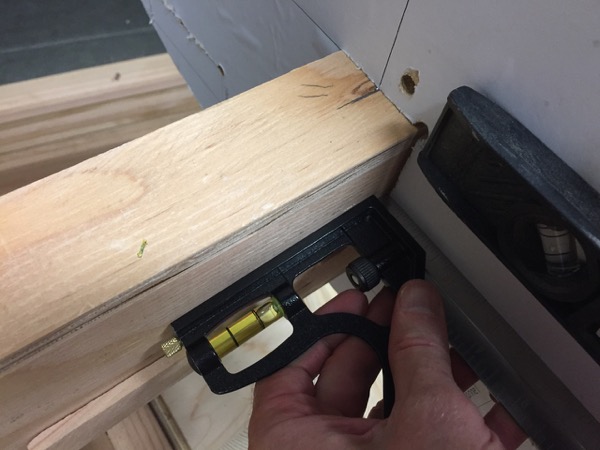
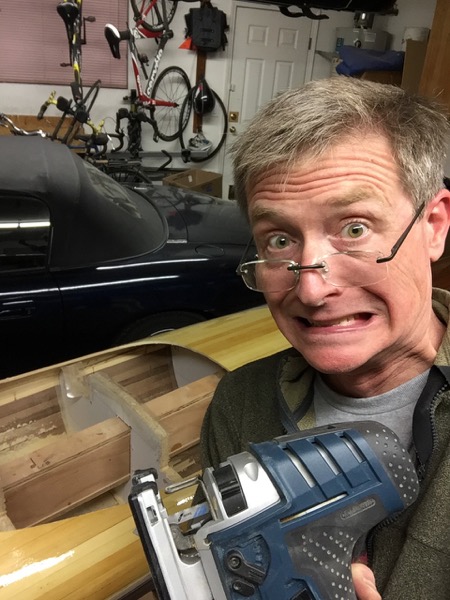
In order to have a straight kayak when you're finished, the stations have to be straight when you start! I spent a lot of time levelling and centering each station. This is important. I used a lot of shims; when I was sure they were in the right place I tacked them down with a pneumatic brad nailer.
The last step here, not shown, is to tape off all the surfaces that come in contact with strips, using plastic package-tape. The wood glue doesn't stick to plastic tape, so when you're done you can remove the form.
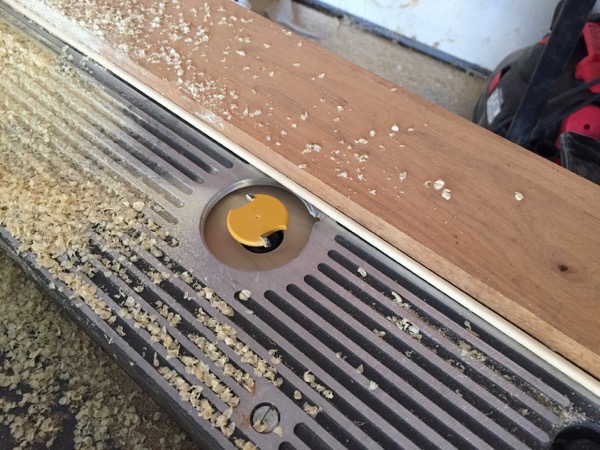
The sheerline is the top hull strip (bottom strip while building the hull) and it needs to be female on both edges so that you can build up from it on both the hull and deck sides. I built a jig on the router to cut the half-round cove, glued 8' strips together to make a long enough sheerline strip for each side, and stapled them in place so that the bottom edge of the sheerlines was at the 'widest point' mark on each station.
Now I'm ready to start filling the hull strips in.
I always put in strips symmetrically, in hopes of minimizing any twist or warpage from doing just one side at a time. I also have a full-time job, so this was usually an hour or two every evening, 1-3 strip pairs a day.
At the bow and stern, I alternated the overlap.
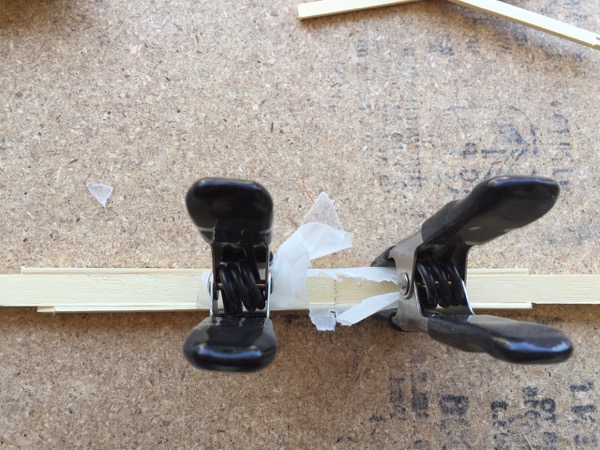
Talonstrips come in 8' lengths, and this is a 17' kayak, so there are a lot of splices. Not a problem, though: apply a dab of glue and the talonstrips just slip together.
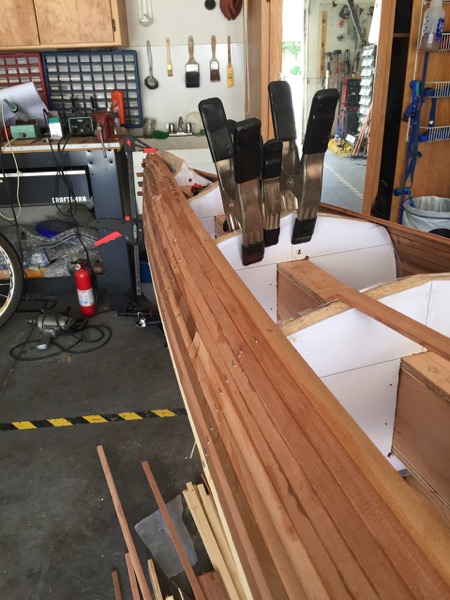
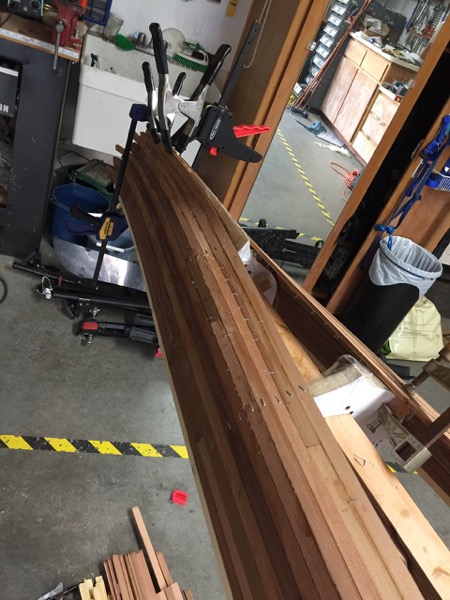
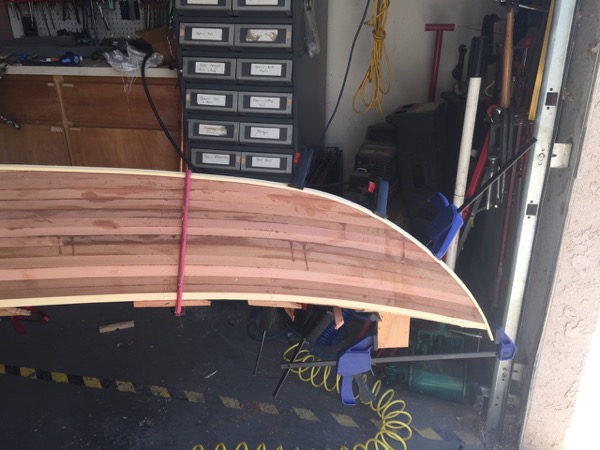
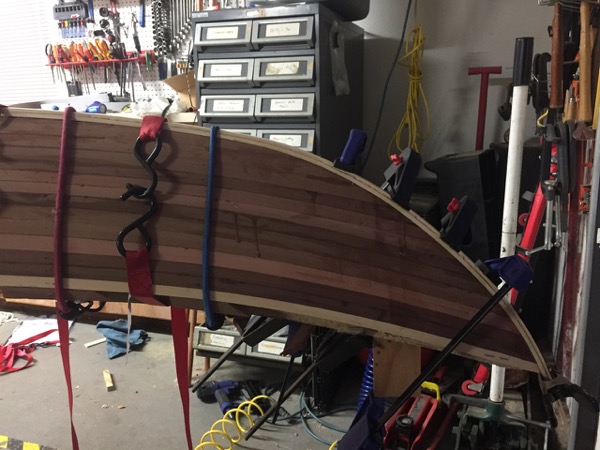
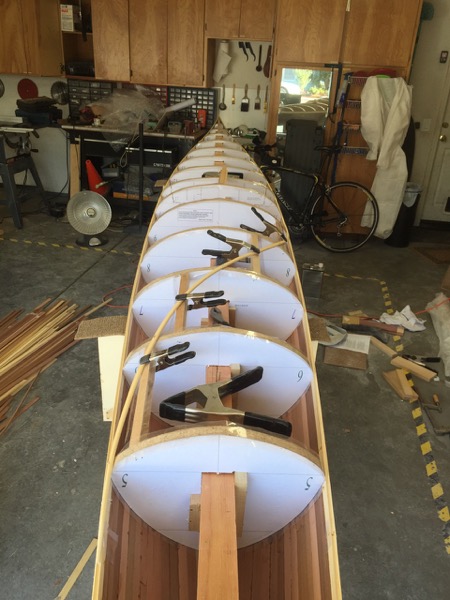
I used a lot of clamps.
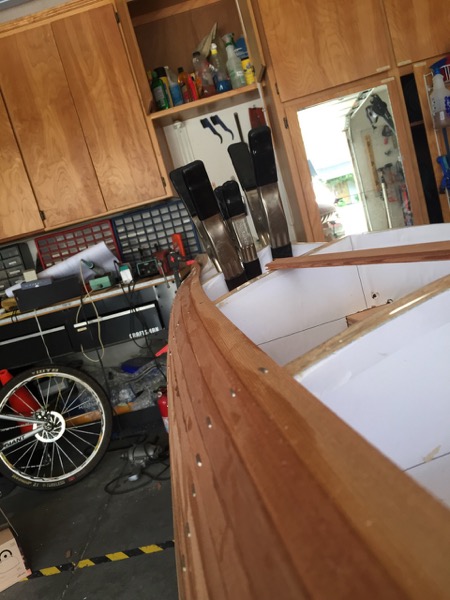
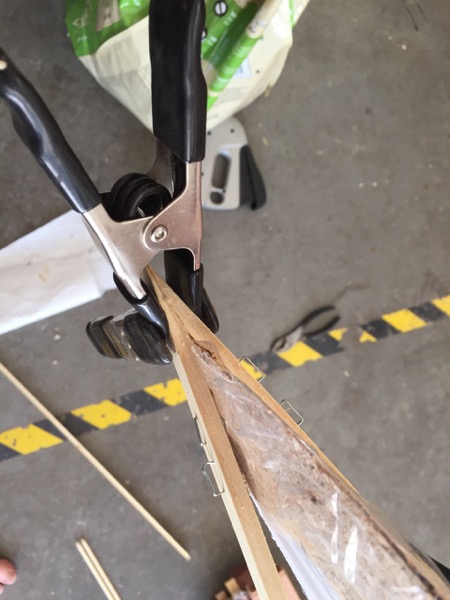
Here you can see the alternating overlap at the bow. You can also see the campstove and teapot I used to steam and twist the strips to fit in the more curved areas.
the concavity at the stern was a real bear, and I had to steam and twist each piece to fit. Still used a lot of clamps!
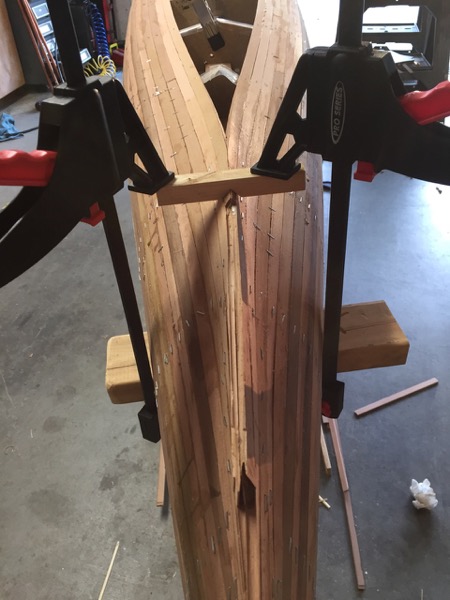
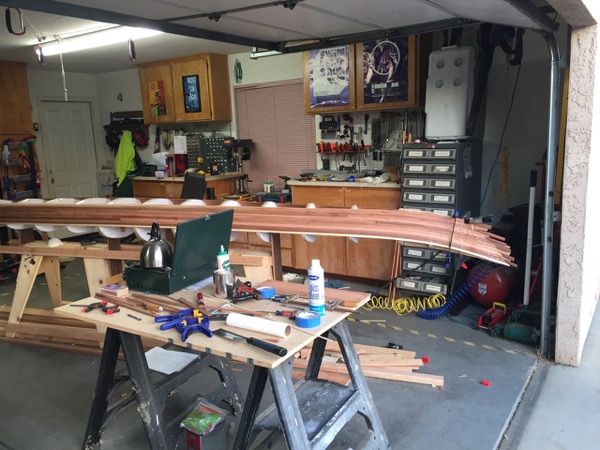
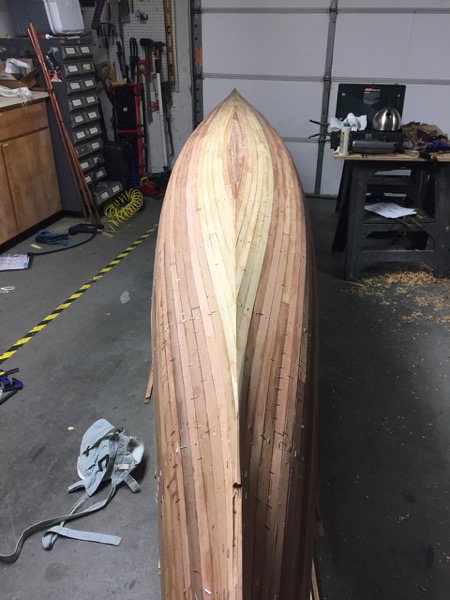
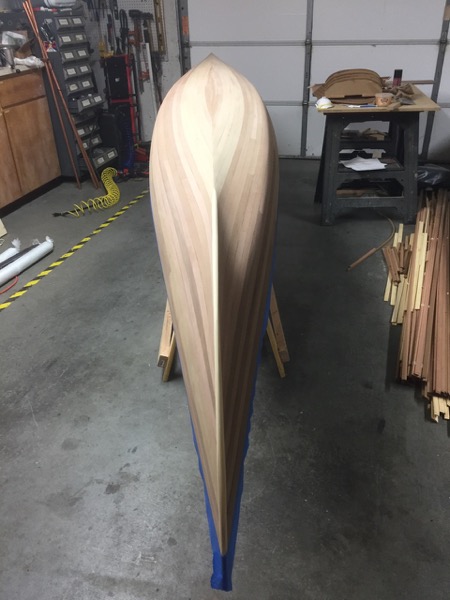
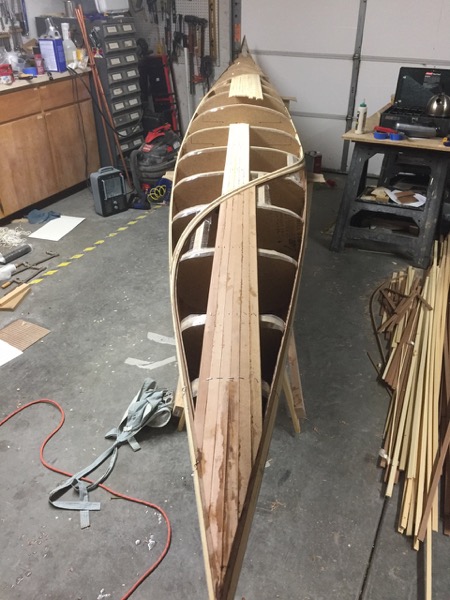
Almost done. I had some lighter red cedar; rather than mix it in I saved it all for the center of the hull.
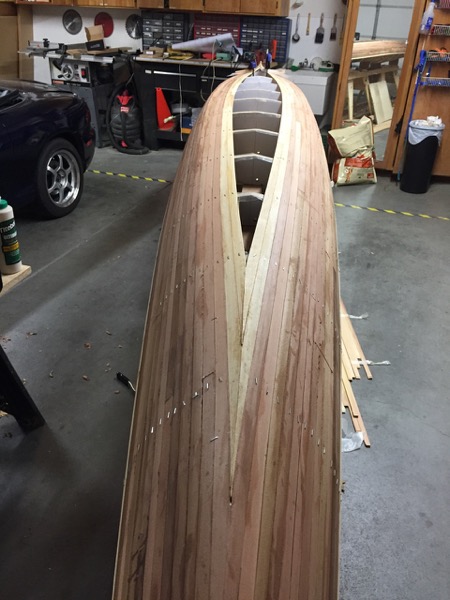
The last few hull strips are a pain to place: each has to be tapered just right so that they fit. Patience and a sharp block plane did the trick, though. At this point it's pretty damn ugly. That'll change!
That's everything you want to know about this particular evening.
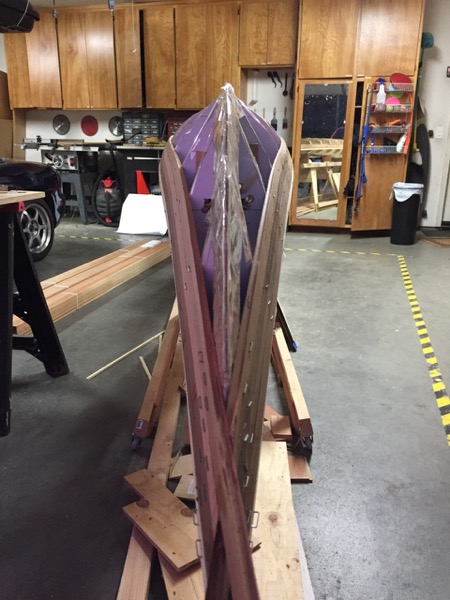
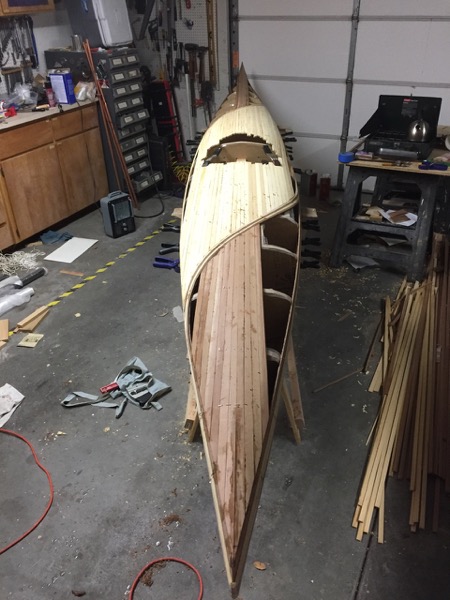
Next step was to cut off the overlapping 'fingers' at the bow and stern, plane the joint to a reasonable flat curve, and glue bow and stern strips on...
... Two layers.
Before and after. Very satisfying!
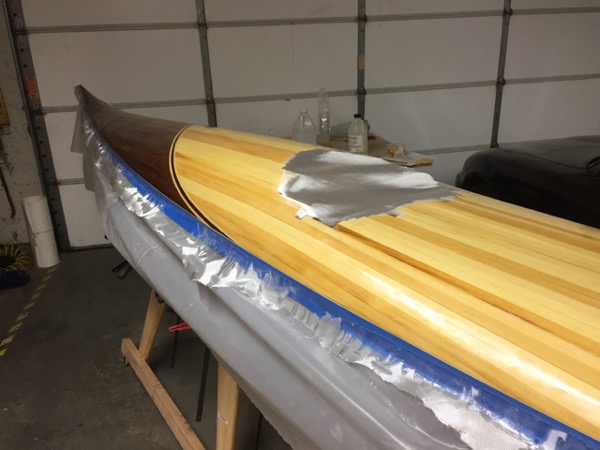
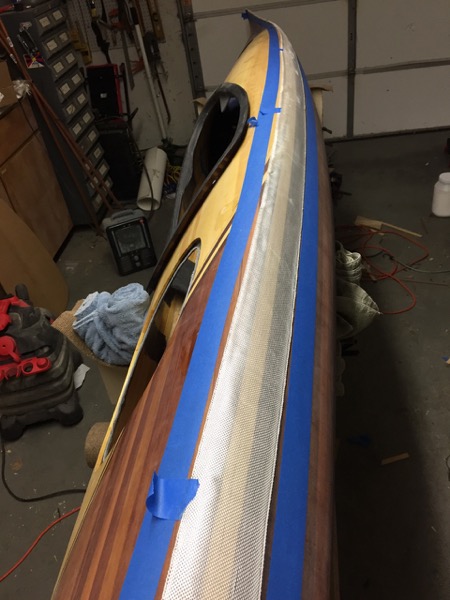
Here's where I got into entirely new territory, and I did a first-time job of it. I used Raka 127 low-viscosity resin and 350 low-blush hardener, which I think was a good choice; I erred on the side of too much epoxy though, and the glass floated a bit. This just means that there's extra epoxy weight, which adds nothing to strength. Also the glass isn't as smooth as it should be, so the high spots get sanded off which weakens those areas. Live and learn...
I used 6-oz e-glass on the hull, with a second layer of 4-oz e-glass for an abrasion patch, and an additional 2" strip of glass tape at bow and stern impact regions. Also, three coats of epoxy to fill the weave so I could sand it flat and smooth without cutting into the fiberglass weave. Each of these had to be applied before the previous one cured completely, so every 3-4 hours... This was a long weekend with sporadic sleep.
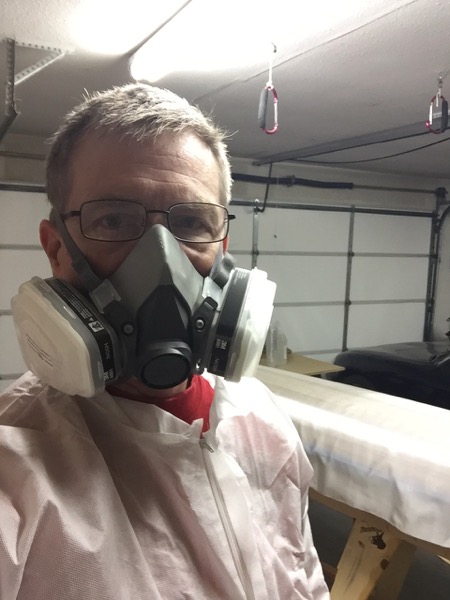
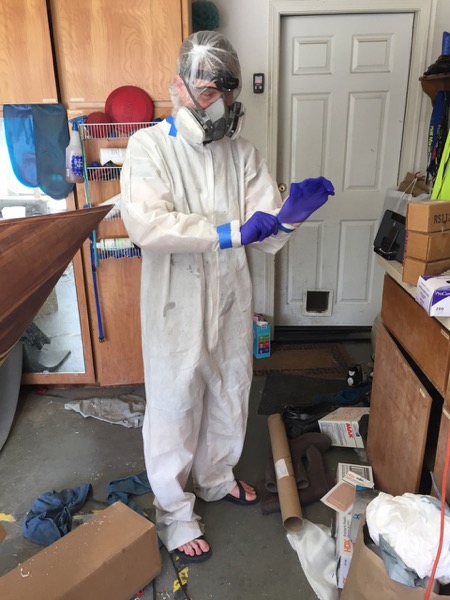
Proper PPE is important here. I'll need those lungs for paddling later.
First layer of 6-oz glass.
Abrasion patch, 4-oz glass.
The fiberglass and the resin have the same index of refraction, so the glass cloth disappears into the clear resin and shows only the wood.
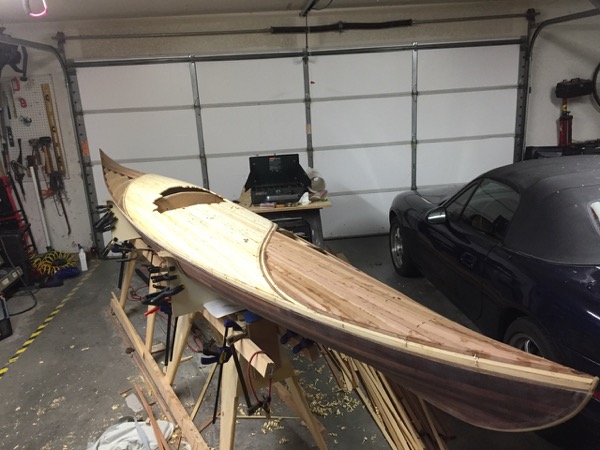
After trimming off the extra glass at the sheerline, it feels like you're half-done. Not even close, of course, but I did get to turn it over.
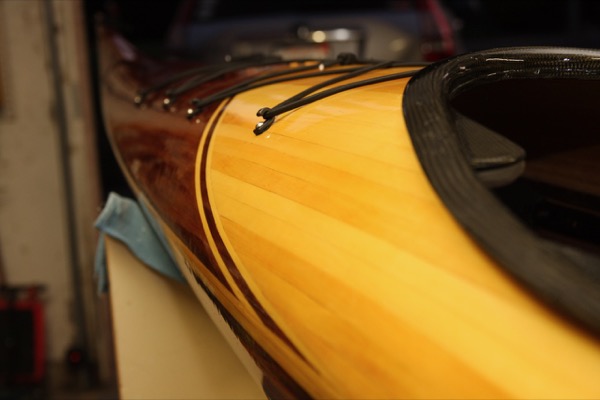
This took a very long time, because I couldn't just make it normal. Instead of just stripping the deck, I made a 'swoop' of yellow cedar across the middle, which meant outlining and lots more trimming per strip. Each strip on the deck was actually three strips: bow strip (red cedar) and center strip (yellow) and stern (red again) and every strip section had to be mitered on both ends and fit exactly. I like the results, but if you're in a hurry to get a kayak done don't do this.
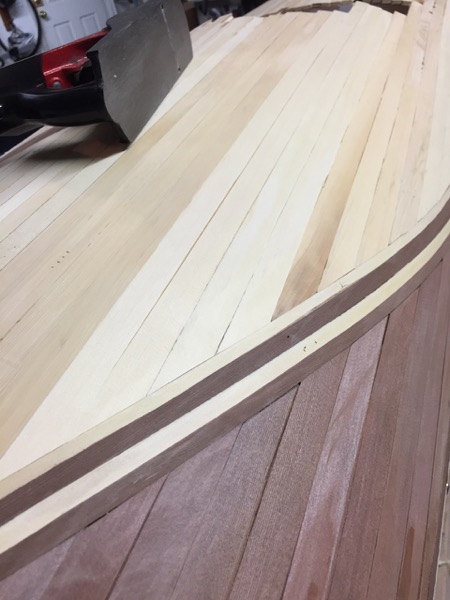
I started by outlining the regions with thin strips. This picture shows only the first strip, but I used 4 in alternating colors. Two form the 'line' and two form the borders of the respective color regions.
Every single strip had to be mitered and angled on both ends.
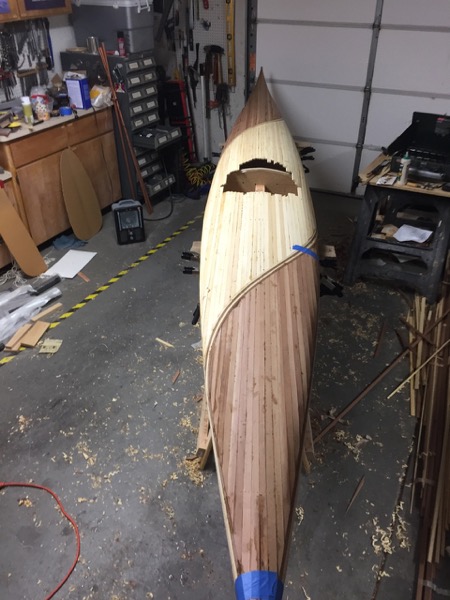
All the deck strips are straight, other than the thin outline strips. I was concerned that such an asymmetric pattern might cause a warp in the kayak, but keeping the strips axial minimized this risk.

It was just a stupid amount of work to do it this way.
The closer to done, the harder it was to do. The last strips have to be cut with long tapers and angled just right so that they can fit in the last thin gaps with zero placement clearance. On the hull there were two 'last strips', one on each side. Doing the deck this way meant there were six 'last strips'.
Finally done stripping the deck. Incredibly ugly, but wait until it's smoothed!
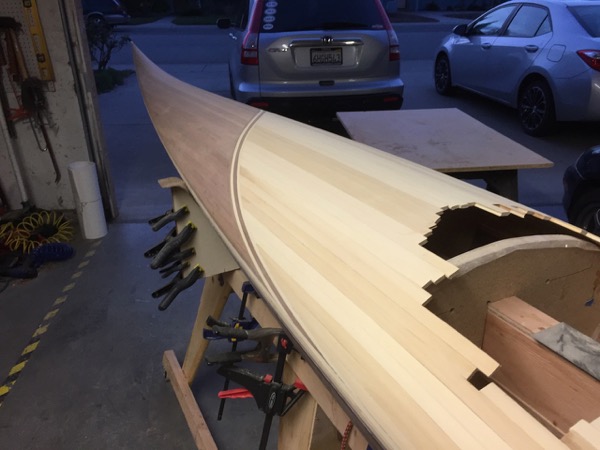
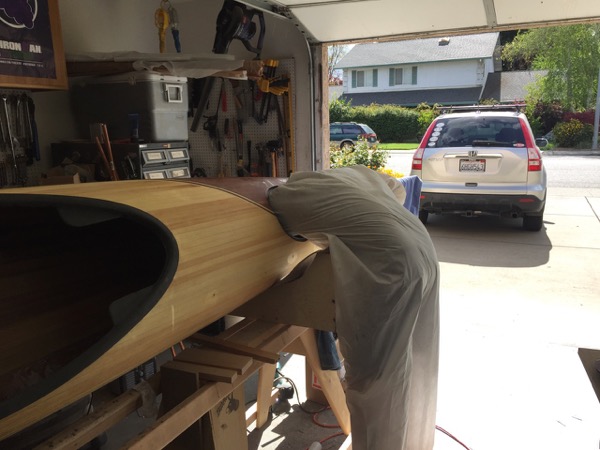
This is such a rewarding step. The cedar shavings smell wonderful, and it's a joy to turn the ugly splintery glue-stained mess into a smooth sleek thing of beauty.
I used 4-oz glass fabric here, as the deck (hopefully) doesn't take as many hits as the hull. Quicker and smoother too, as I'd started learning how to do it right.
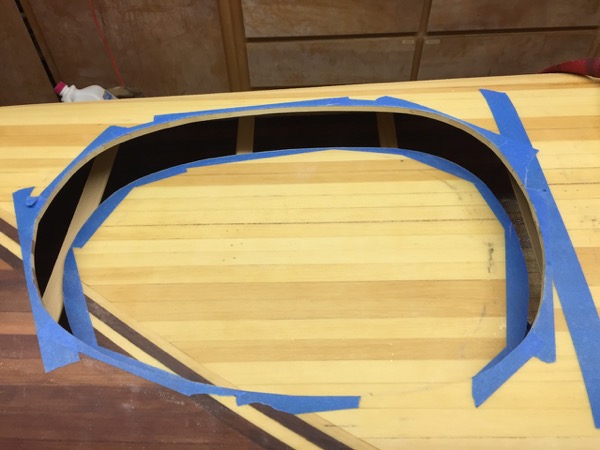
This was the scariest thing : all that work on a beautiful deck, then take a jigsaw to it and cut a big hole in the middle. It worked fine.
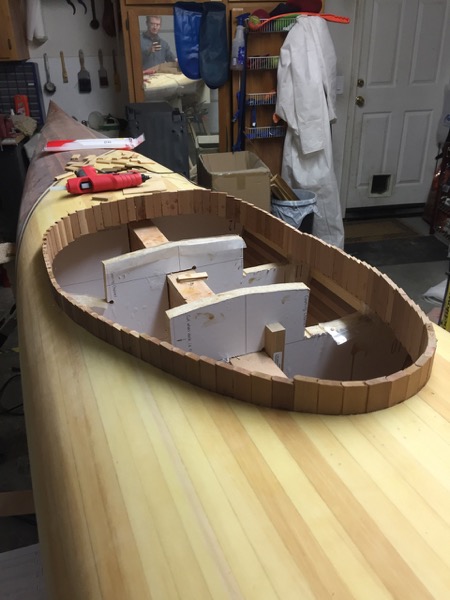
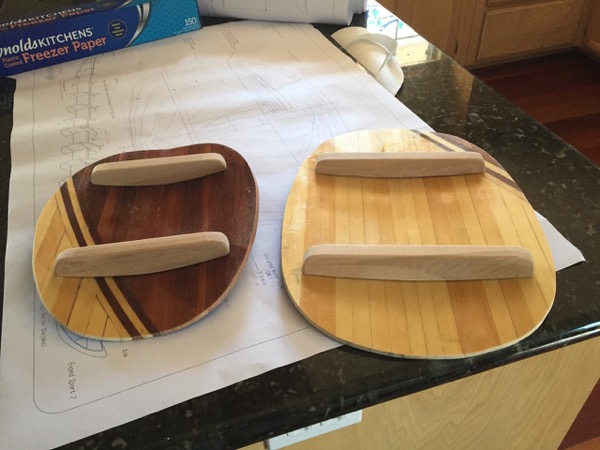
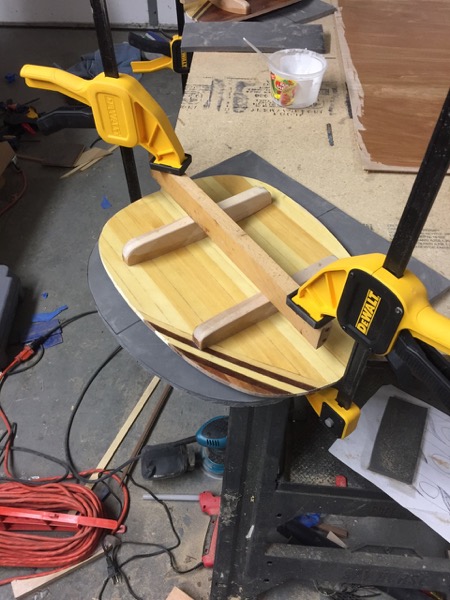
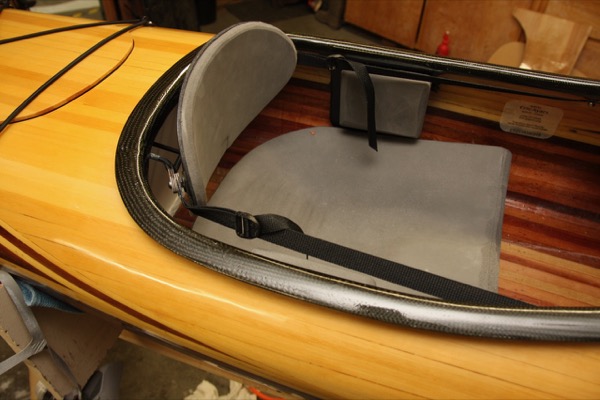
Many of these hours were trial and error... Vaclav recommends using plywood for the coaming riser, and I just could not get this to work well. After trying plywood for awhile I finally just cut 150 2-inch sections of cedar bead/cove strip scrap and built the riser from short upright sections. This is the method that Nick Schade recommends in The Strip-Built Sea Kayak. I tacked them in place with hot-glue while the Titebond was drying: very quick and easy. I'm not concerned with the relative strength of this cedar riser versus plywood, as the cedar is backed up with a large fillet of filled epoxy and fiberglass on one side and the carbon-fiber rim on the other.
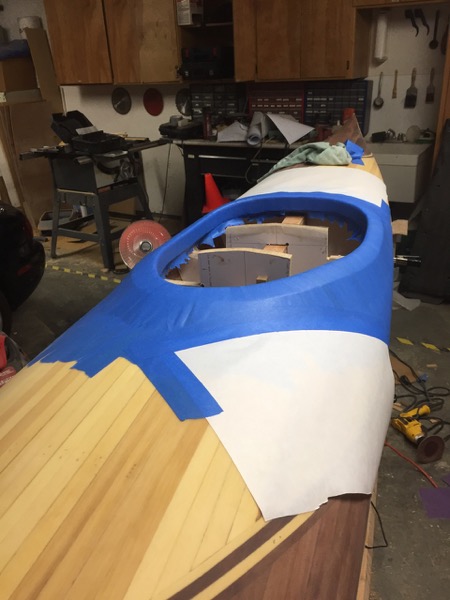
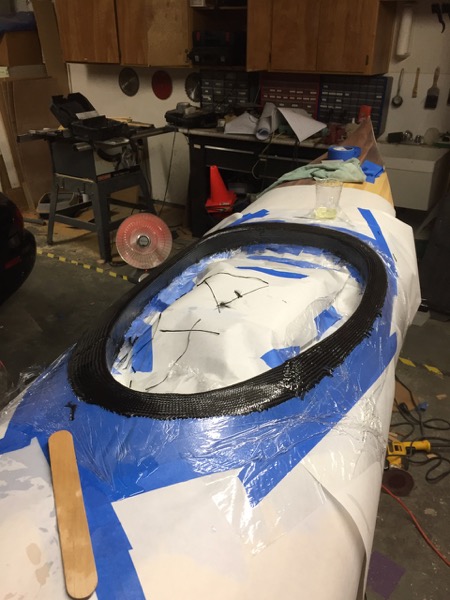
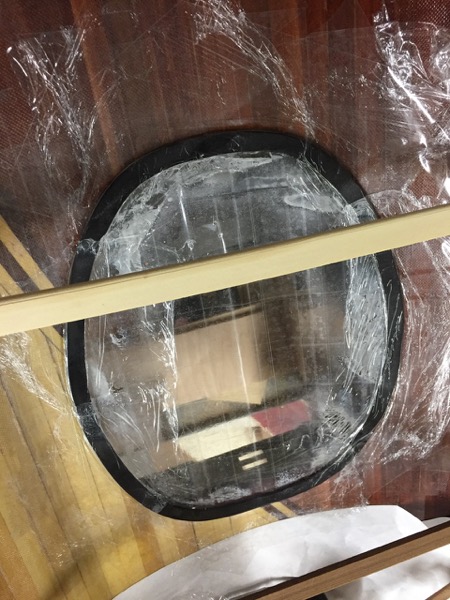
After trimming the riser to height, I masked everything thoroughly and wrapped a strip of minicell foam around the riser to form the bottom 'mold' for the CF coaming lip. I wrapped the foam in tape to make a smooth bottom mold. I then covered this mold with saran wrap as a mold release. In retrospect, packing tape would have been a smoother choice.
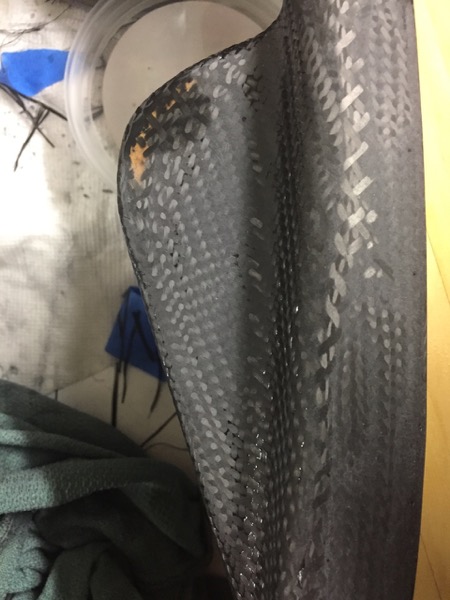
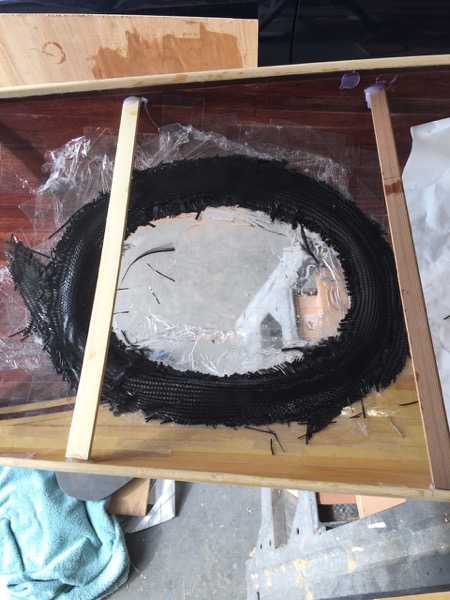
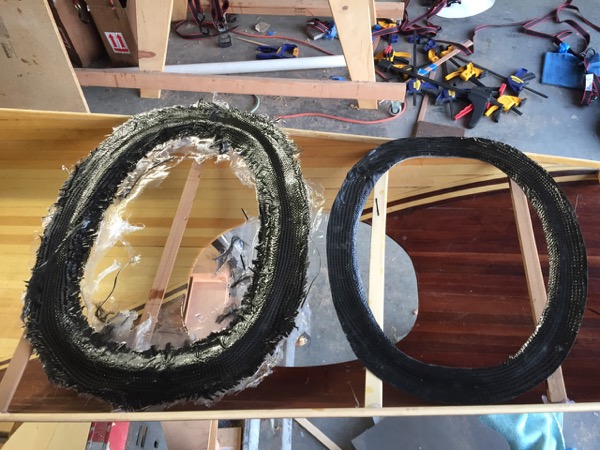
Five layers of bias-cut carbon-fiber twill, with resin: smoothed it out as best I could. I got some small bubbles in it which showed up later as I sanded too much. Chalk that one up to experience!
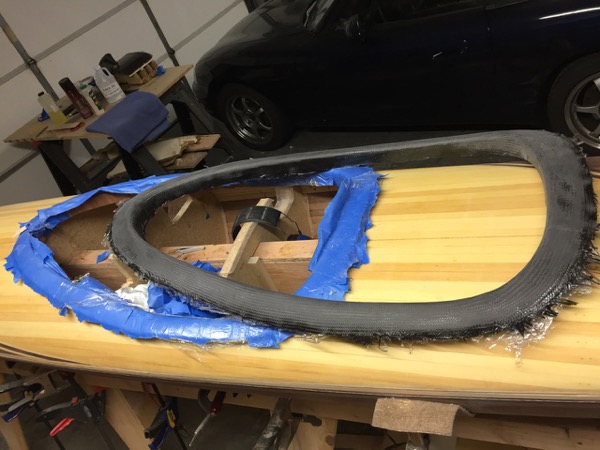
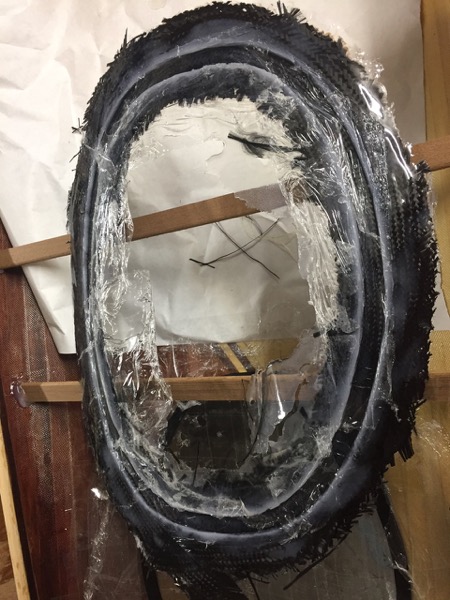
Next I popped the deck off the form and cut the inside of the CF not-flush with the inside of the deck.
Once rough-cut on the inside, I pried the CF rim out of the deck. This was scary too, because it didn't want to come out. Eventually I used a prybar with a softwood block under it to spread out the counterforce and protect the deck. That worked.
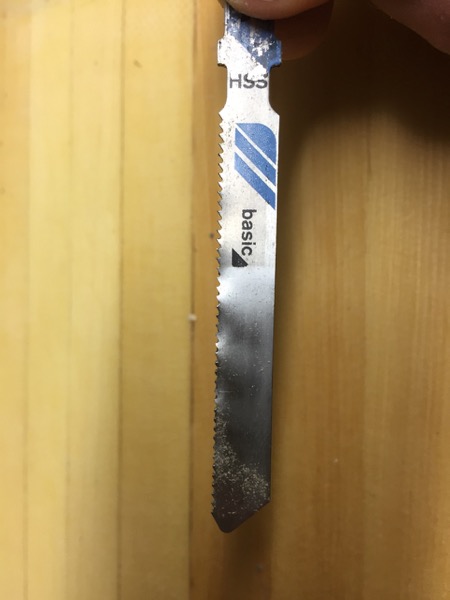
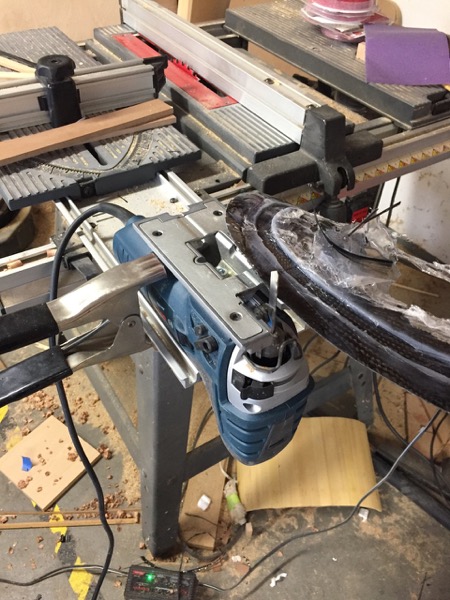
The lip is --deliberately-- too wide, so the next step is to cut the overhang down to size. Cutting CF with a jigsaw is interesting. You start with a new metal-cutting jigsaw blade and it goes through the CF like butter for about 12 inches and then slows down and nearly stops. Your brand-new blade, the expensive Bosch one, is now toast. Put in a new one and keep going... it took 4 blades to trim this lip!
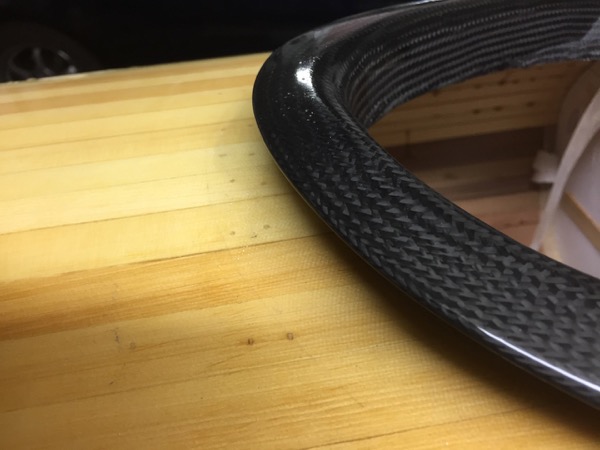
Once cut down to size, butter it back into place with thickened epoxy and sand it smooth.
The CF rim has to be cut flush once glued in place. This was the second-biggest pain in the butt for the whole project. Carbon fiber does not want to cut, and it had to be cut at an angle around the inside, flush with the inside of the deck. Eventually I just cut it as close as I could and sanded it flush with a sanding drum on a drill. Wear full PPE if you do this -- CF dust is nasty.
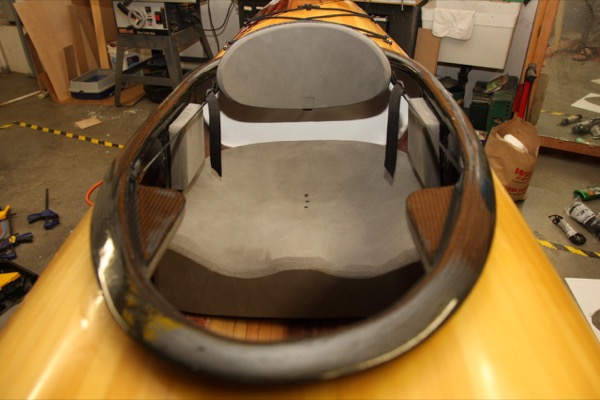
I like having cockpit knee braces, so I glued in 1/8" plywood brace forms, then used CF cloth/resin on both sides to make them strong.
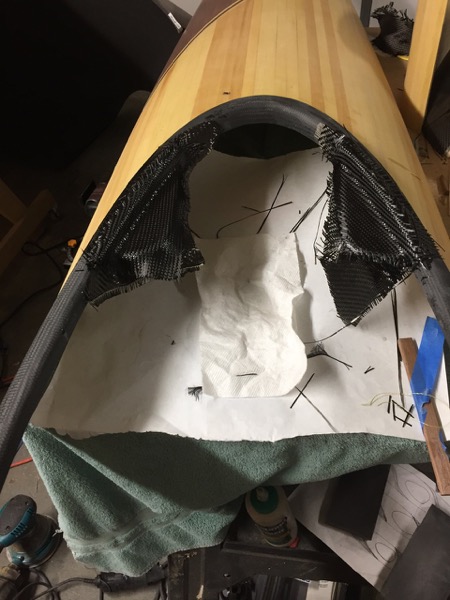
...And if you're sanding the knee-braces to blend them in with the cockpit rim and you sand through --oops!-- just grumble a bit and add another layer of cloth/resin. Which you will also have to sand to blend, so don't overdo it this time!
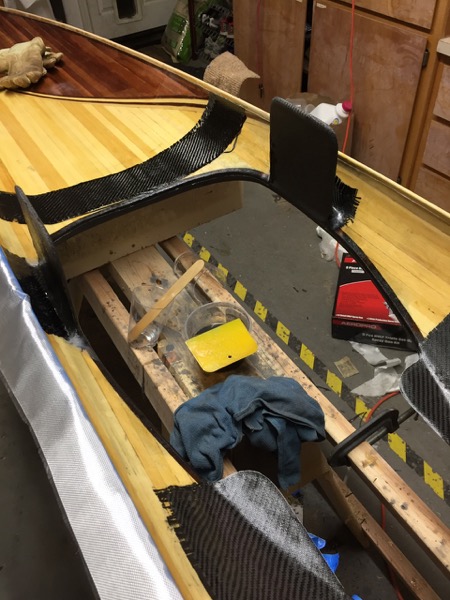
I made hip plates from 1/8" plywood also, with CF on both sides. If you want to make these wood-looking, varnished instead of CF, better use 1/4" plywood; but with CF on both sides 1/8" seems sufficient so far. You can also see in this picture the CF on the inside of the knee-braces, and an extra band of CF behind the cockpit where people tend to sit on their way into the boat. (This picture is out of sequence -- these were added after the inside of the deck was fiberglassed.)
Things went badly wrong in a couple spots here. When I took the form out, I put spreaders in place to hold the hull to the right width until the deck was glued on. That's good. For some reason I never thought to do the same to the deck while it was off the form, and it curled. The first time I tried putting the two together the deck was 3" narrower than the hull! I had to use spreader clamps to hold it to the right width, let it sit a week, then glue the two together with interior braces on the deck that I pulled after the glue cured. This took an extra 10 hours and added a bit of grey to my hair. The residual stress caused the hatches to not fit right (they curled once cut) and also the finish bubbled in high-stress regions the first time the sun hit it.
There's nothing to be done about it now; I just have to accept that there are lines of bubbles down the center of the deck. It still floats, and I'll not make the same mistake on the second kayak.
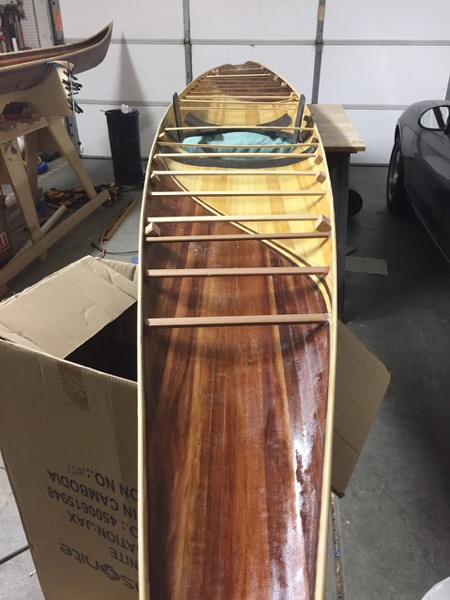
Cleaning/scraping/sanding the inside of both hull and deck was a real pain. You can't just use block plane and belt sander, since the surface is concave. The only power tool I could get in there effectively, sometimes, was the orbital sander; so I spent a lot of time with curved scrapers, and learning how to put a proper burr on scrapers, and sanding by hand. It took some patience. This doesn't have to look as nice as the outside; it still needs to be smooth enough to take the fiberglass cloth evenly though.
Again, this took a lot of additional time to fix the curvature problem I made for myself by not bracing the deck when I took it off the forms.
I started the cuts for the hatches with a Dremel diamond cut-off wheel. Once the cut was started, I widened it with a strip of sandpaper until I could get the jigsaw blade in, then cut the hatch with the jigsaw.
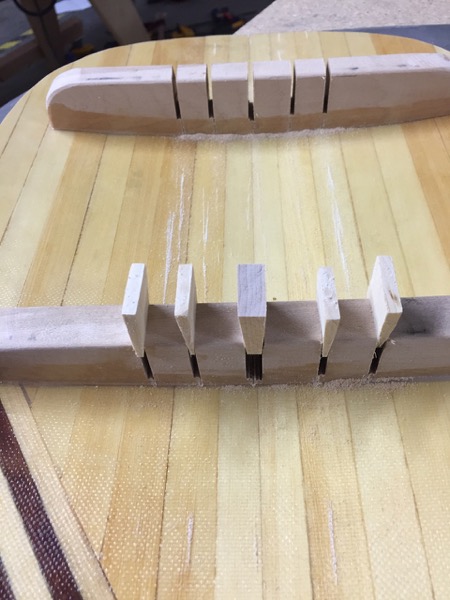
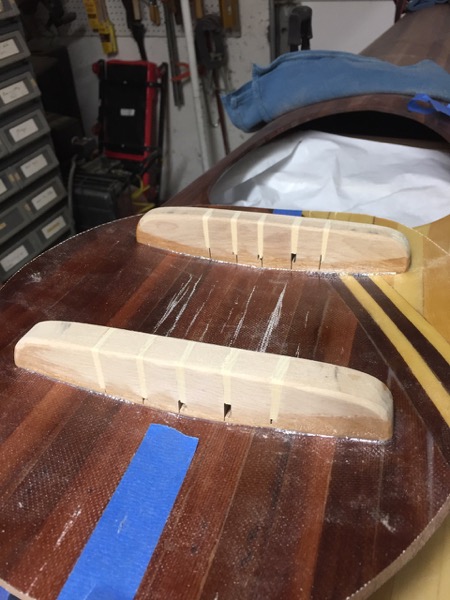
The hatches were curved more than the deck, since the deck was now braced and the hatches had taken the wrongly-curved shape before bracing. So I made some braces to fit inside the hatches and hold them to shape.
The braces still didn't have the right curvature, so I cut slots in the braces and added wedges until the hatches mached the deck.
Next up was to make the hatch lips. I first covered the hatch area, on the inside, with a 'wall' of plastic tape. I put 1/2"x1/8" weatherstripping around the inside of the cut to make a seal seat, and covered that with saran wrap to keep the CF/Resin from sticking to the weatherstripping.
Multiple layers of CF cloth and resin make the lip.
The lip came out easily enough, but getting the saran wrap off was a problem. Any wrinkle trapped resin, and I need to find a better way of doing this on the next kayak.
This looks sketchy, but it's an easy way to cut the edges of the lip inside and out.
Here's gluing the lip in place on the inside of the deck, as seen from the outside. The lip groove was later filled with soft neoprene and seals reasonably well.
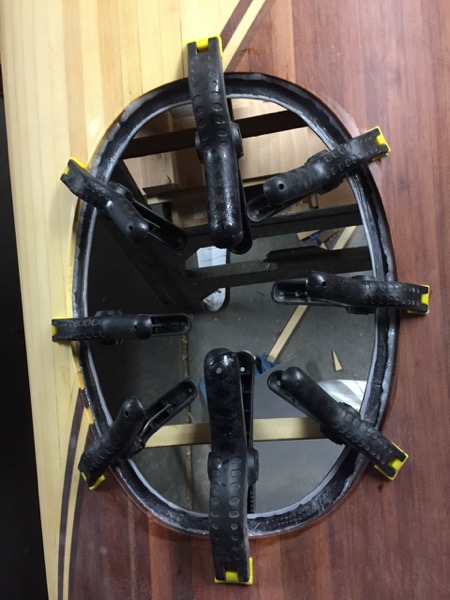
I used a bunch of tie-downs to hold it together while the glue joint cured.
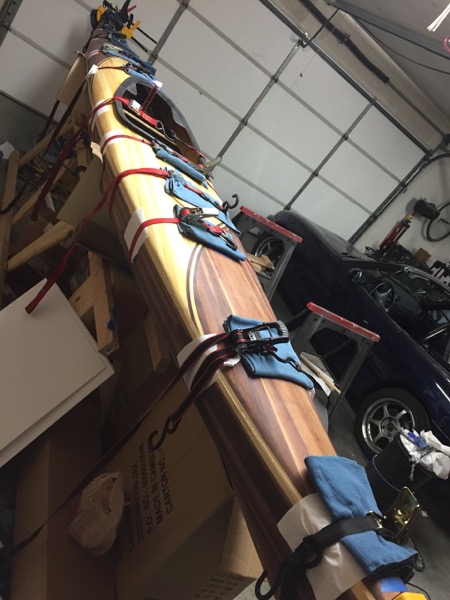
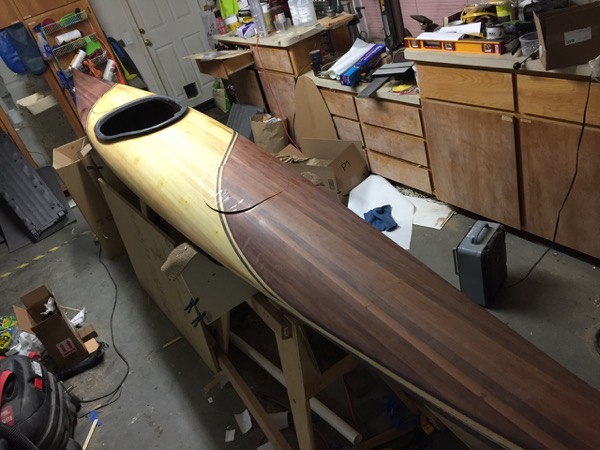
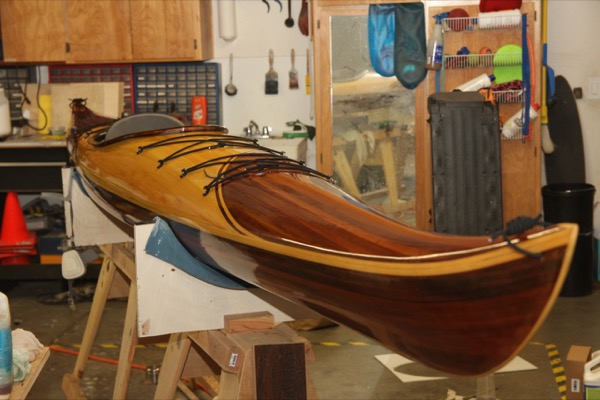
Hey, it's a kayak now!
Fiberglass tape to secure that seam.
It needs fiberglass tape inside and out, so... This was a real mess. Despite the plastic bag over my head I still got epoxy in my hair.
This was 'fun': Bow and stern end-pours. I figured the easiest way to get the epoxy to the ends was to use gravity. One unforseen problem is that the heat of the curing epoxy on the pours overheated the epoxy that I'd used on the seam tapes. Next time, have the end in a bucket of cold water!
I drilled deck-hardware holes and the bow/stern handle-rope holes. To do these, I drilled the holes oversized, filled them with thickened epoxy, then drilled the epoxy to the correct hole size. This way there's no exposed wood.
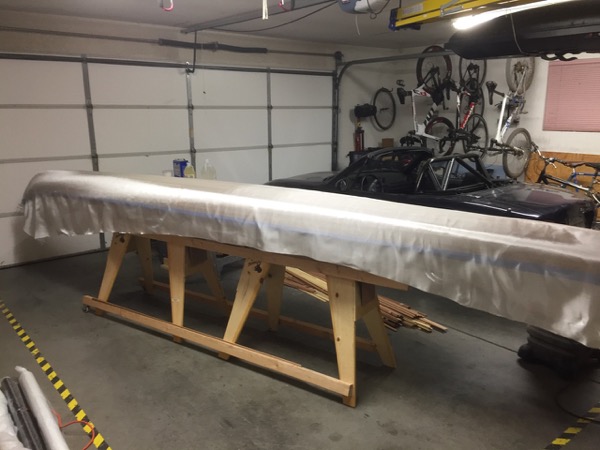
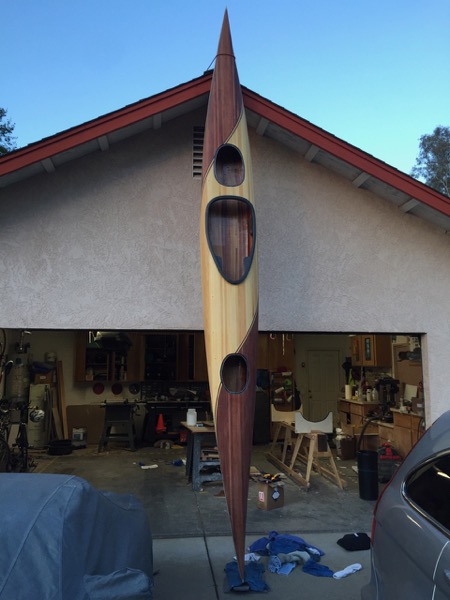
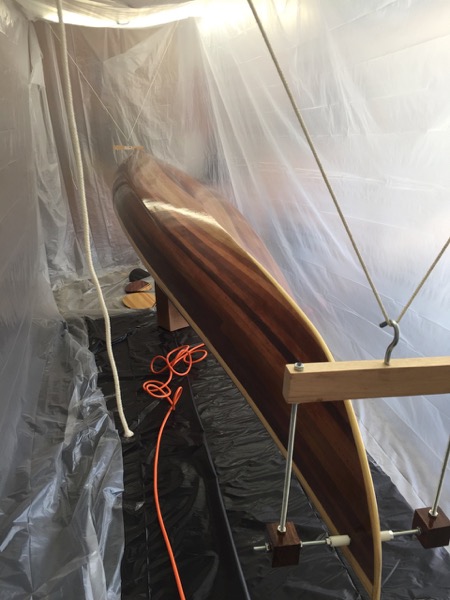
I sanded it down to 800 grit. Overkill, but at this point who's keeping track? Then I made these brackets to go through the end-holes. They're shaped like this so that I can hang the kayak either way, and turn it over (with help) without touching it so I can spray both sides easily without marring the wet varnish.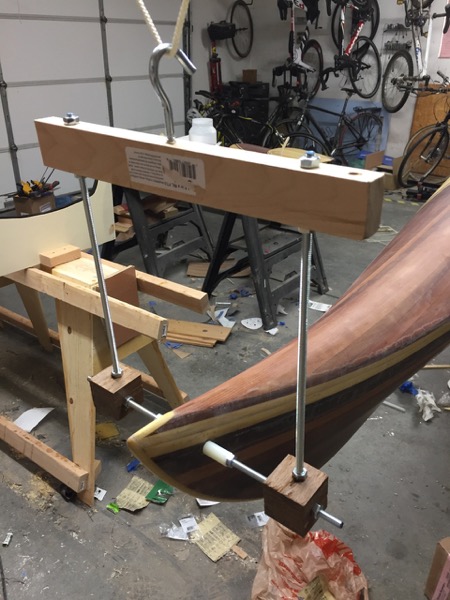
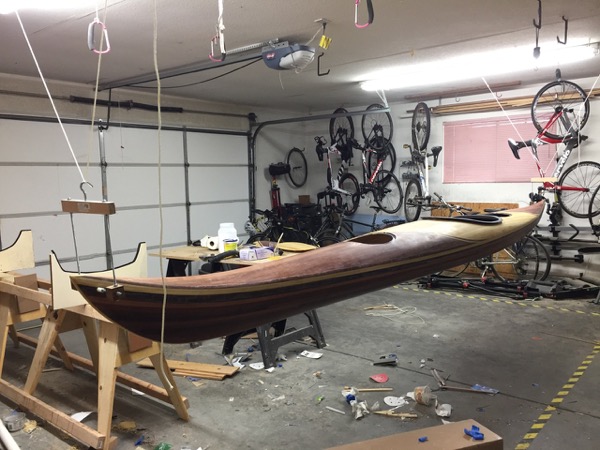
Here it is suspended across the back of the garage.
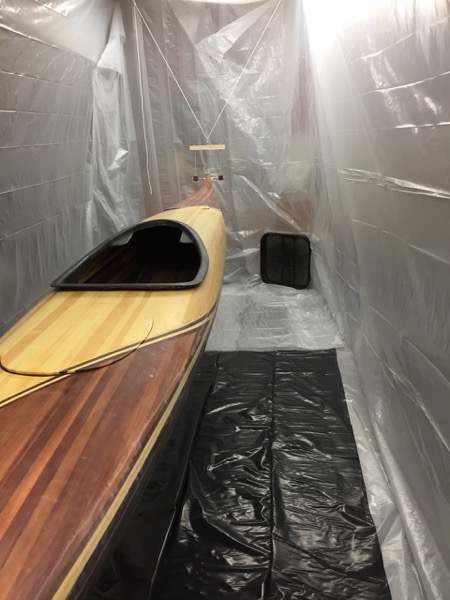
I built a spray booth tent around it, with a filter and box fan at one end and a small opening at the other. Let this run for a couple days hoping to get all the dust out...
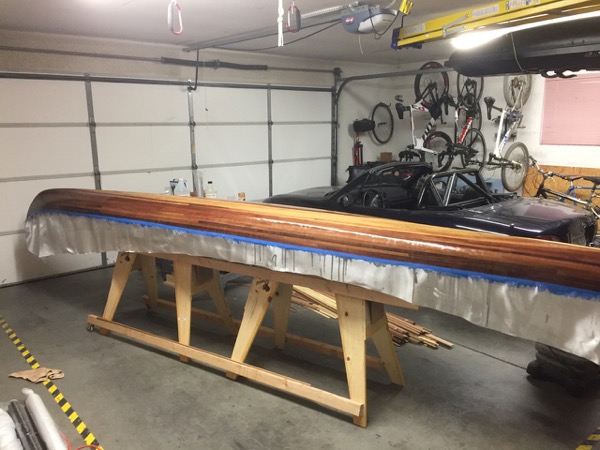
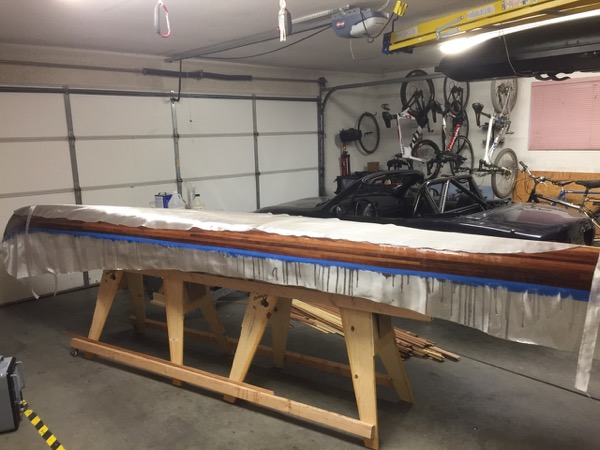
I had never sprayed varnish before, but not knowing what I'm doing has obviously not interfered at any stage in this build so why start now? I bought a cheap HVLP sprayer off Amazon and it worked surprisingly well. Better than brushing!
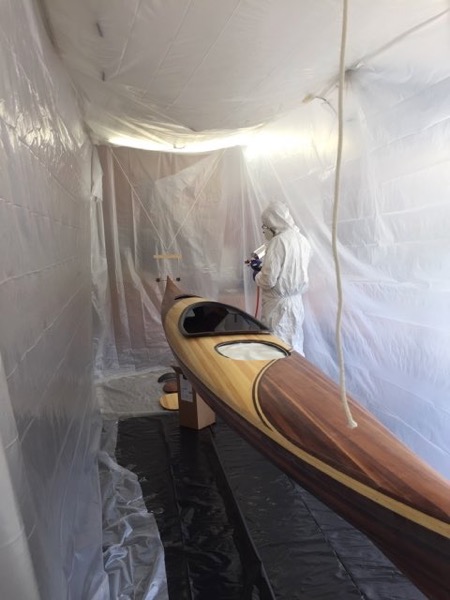
The brackets worked, I could coat both sides in one session.
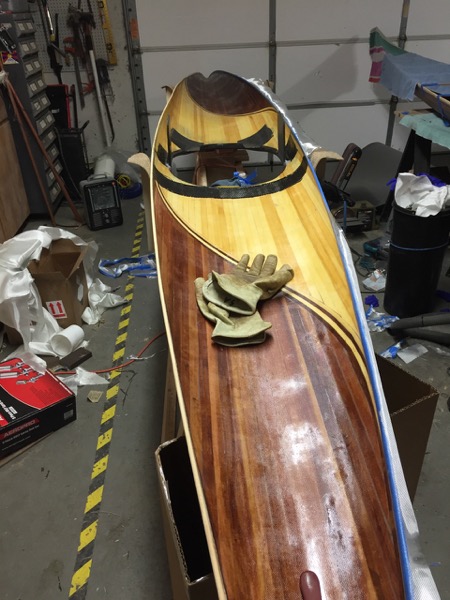
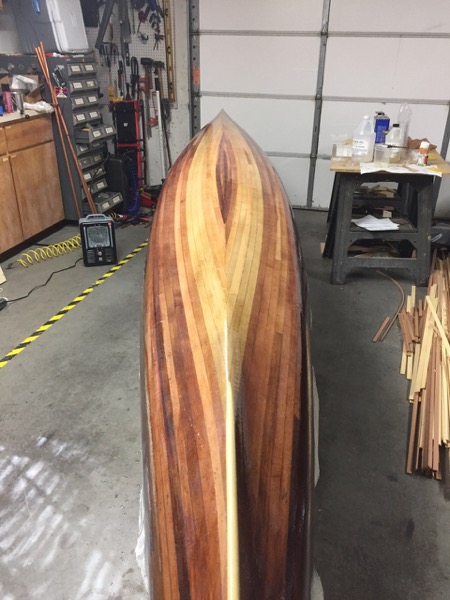
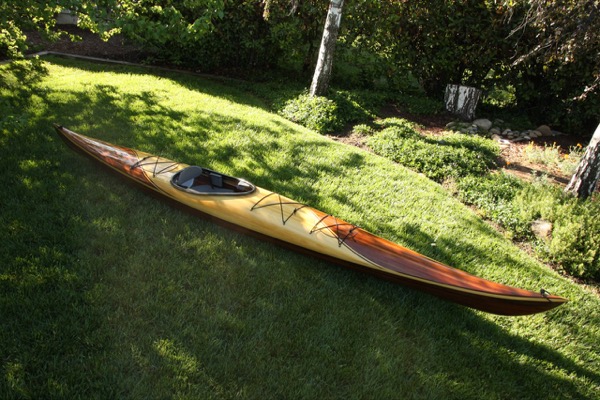
After a few more hours of 1500-grit wet-sanding, buffing, polishing, and waxing...
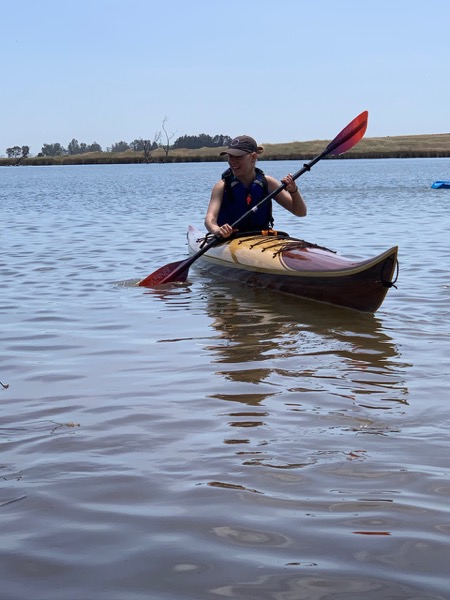
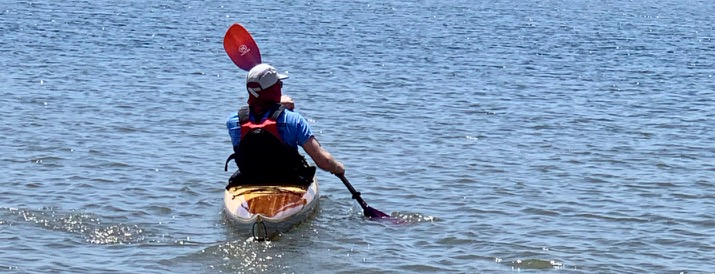
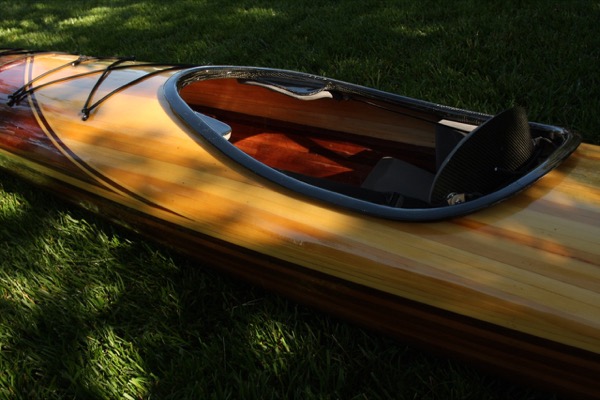
It's gorgeous, and worth every hour of work.
There are some things I didn't describe here...
My daughter likes it enough that she's put in an order already. She wants one slightly smaller, almost entirely red cedar with yellow inlays. It'll be nice to have two anyway so that I can go kayaking with others, and I'm looking forward to building one now that I know what I'm doing!